 Muser Studio
 🪄Quick Tip:
Set Up Sonicake Pocket Control for Video

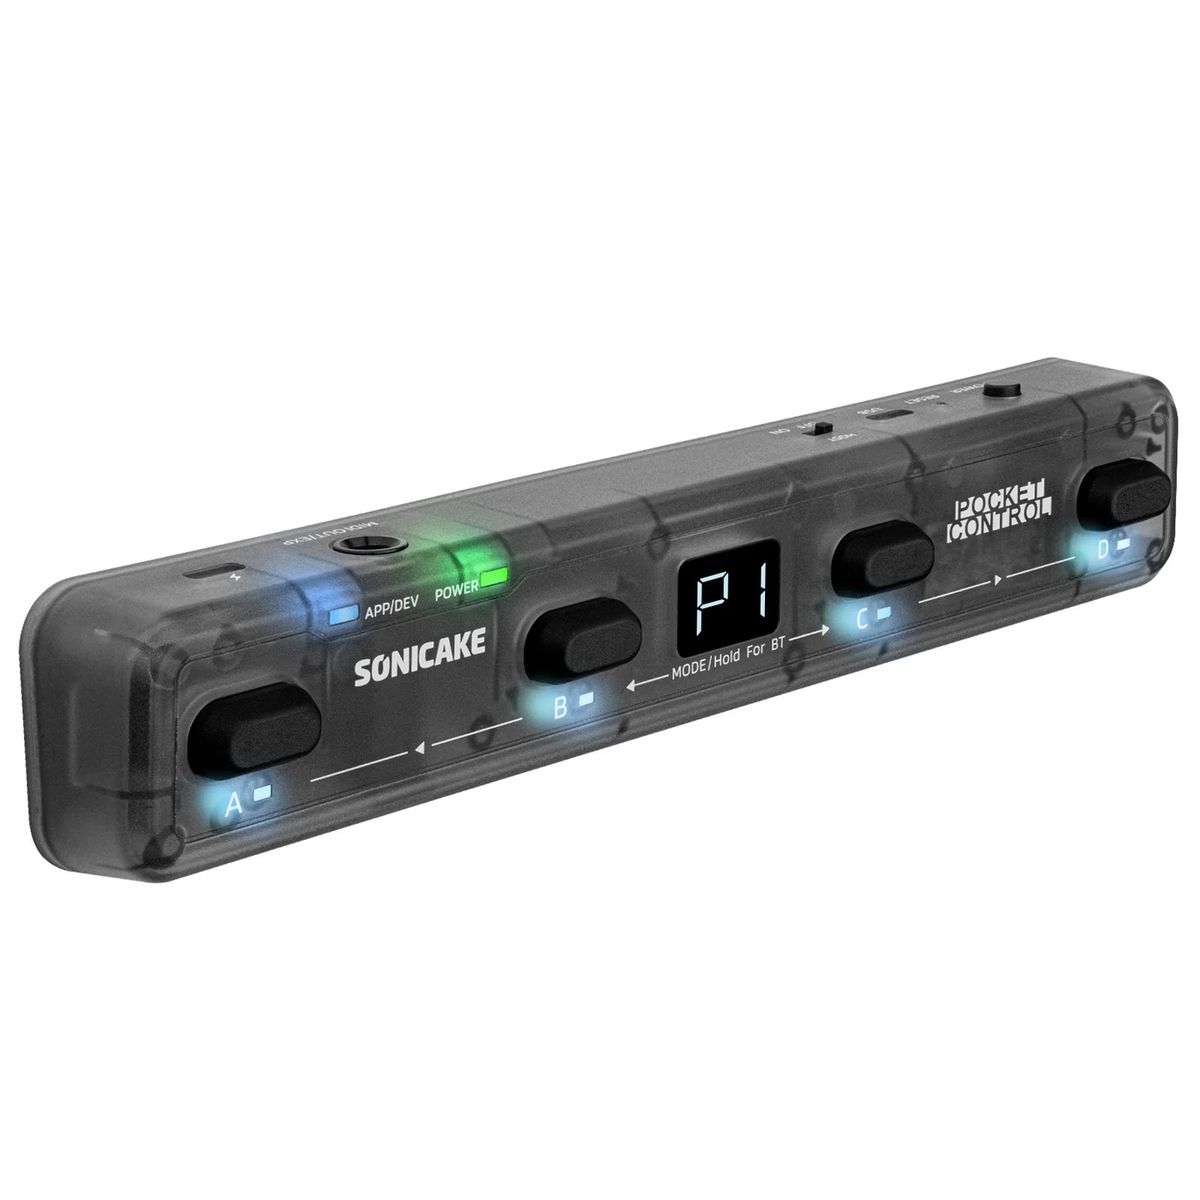
Silence is golden
As much as I love the M-Vave Chocolate with its decent price point, stability and responsive feel, its clicky sound can be invasive. This is especially problematic when looping quiet or ambient sounds. IKMultimedia’s iRig Blueboard doesn’t even connect with newer iOS devices so that’s an issue too.
Then came the Sonicake Pocket Controller.

What can you do with it?
Currently, and in line with both the M-Vave Chocolate and the IKMultimedia BlueBoard, the first two buttons, A and B are currently used for remote controlling Muser Studio.
The “A” button handles your session and your click track.
- Tap it to toggle the metronome on or off. That’s your guide click.
- Tap and hold to reset the tempo. The BPM goes back to undefined, so the next loop you record sets it based on its natural timing. This is the one you want when you want to do some free-styling, letting your natural tempo set the pace.
- Double tap to start the recording session, and double tap again to stop it. This is the same start and stop you’d normally do on screen, now under your foot.
- Double tap and hold to bail out. It aborts whatever is happening and starts a fresh project. If you were still recording, that take gets erased. Think of it as the “let’s try that again” button. It takes the most effort of any gesture here, on purpose, because it’s the biggest commitment.
- Tap also plays and pauses your video edit, once you’ve made one. Same gesture, and which one you get depends on where you are: the click toggle while you’re in a session, playback when there’s an edit to watch.
The “B” button works while a session is recording, and it manages your loops.
- Tap to mark the start of a loop. Tap again to mark the end. If a loop is already in progress you’ll see a red ring, and that second tap closes it out.
- Tap and hold to mute or unmute the last loop you defined. Handy for dropping a layer that didn’t work, or just playing with whether it should be on or off.
That’s the whole control surface. Two buttons, your hands free, and the loop building itself while you play.
🕺 Steps to get you stepping
We need to prepare the Pocket Control device, and let Muser Studio know that it’s available. There are two parts to this - let’s get into it.
Part 1 - Sonicake Pocket Control Preset

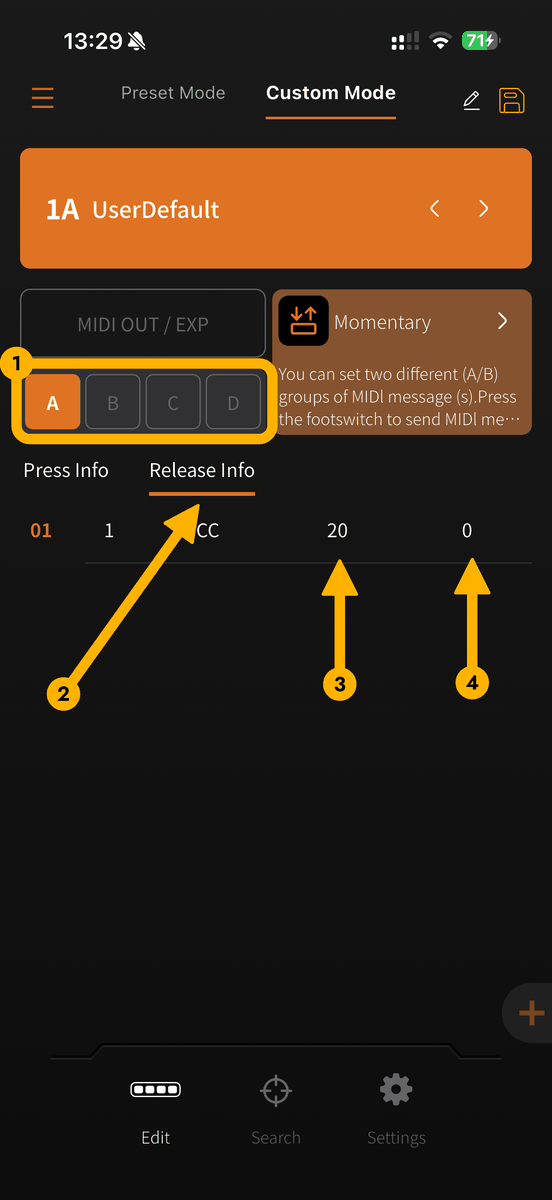
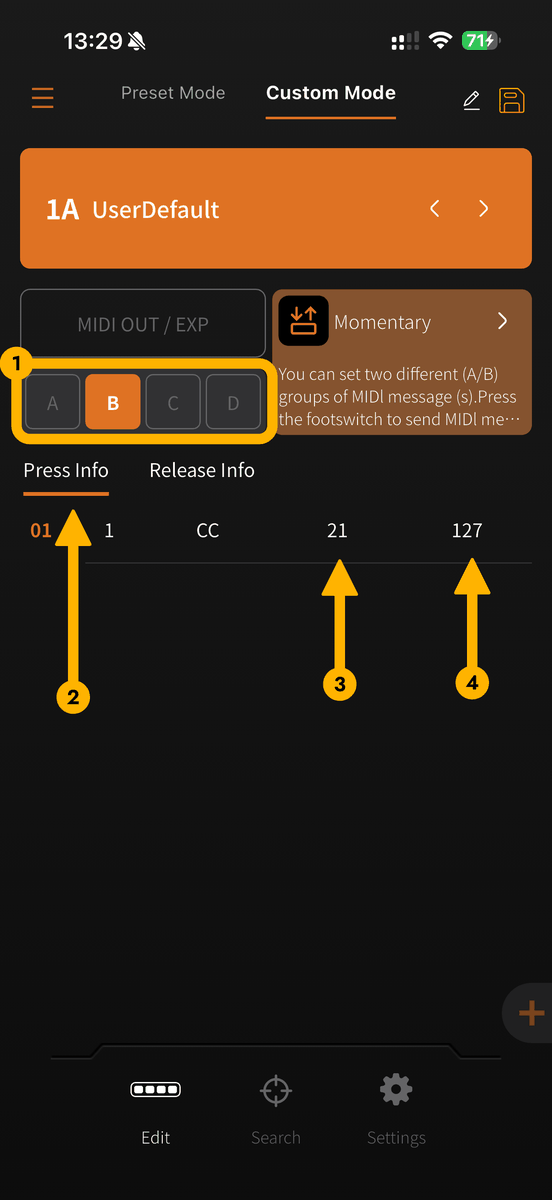
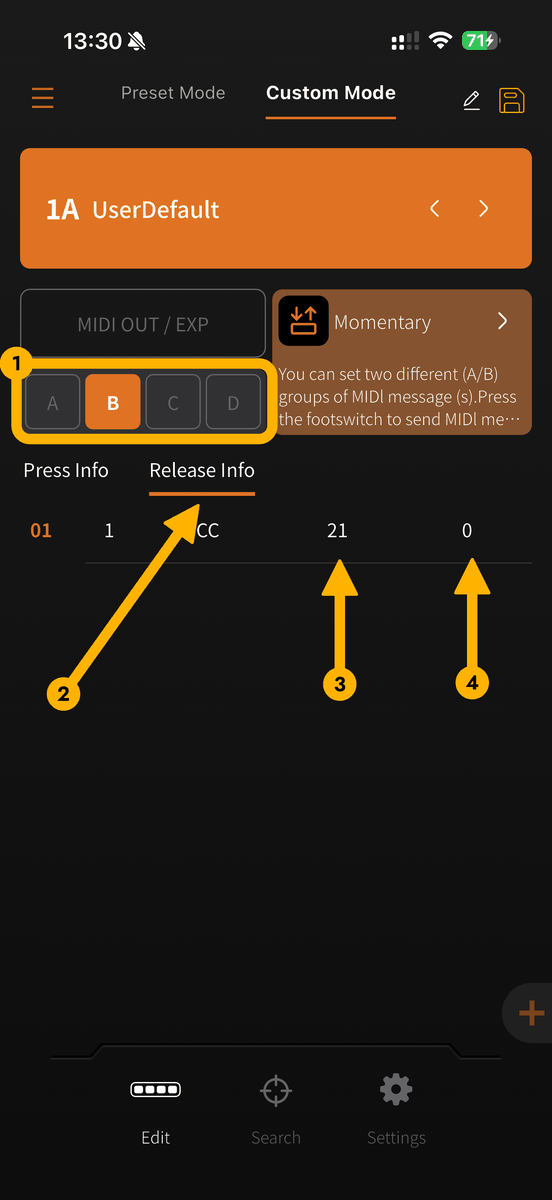
Download and open Sonicake’s Soniclink app to create the necessary preset. We need to create a specific signal for presses and releases on buttons A and B.
These images will guide you through the steps. Just follow the annotations in order of their number (and comment or message if you get stuck).
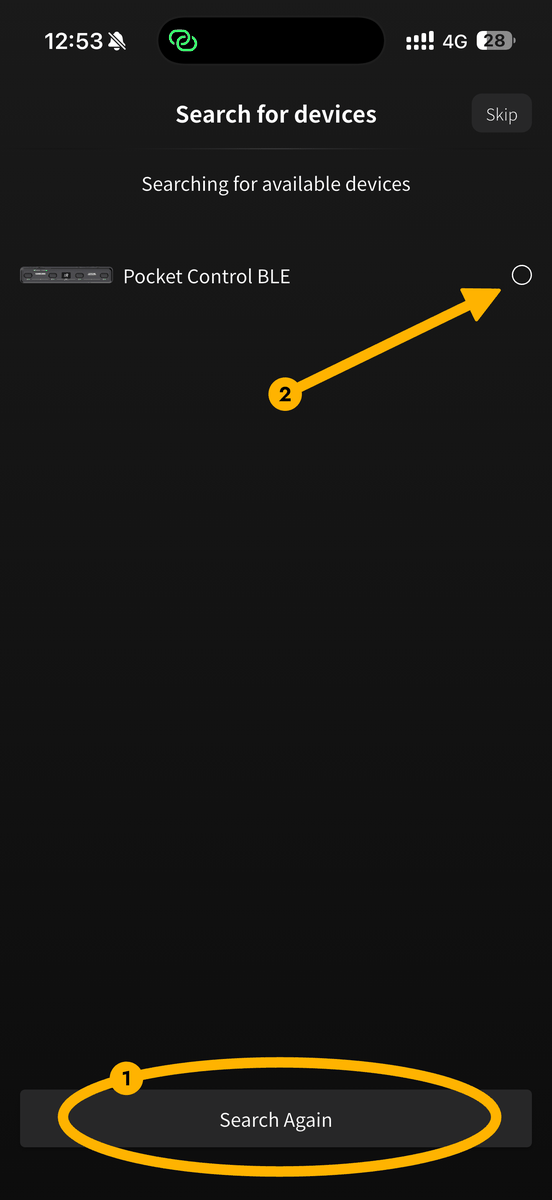
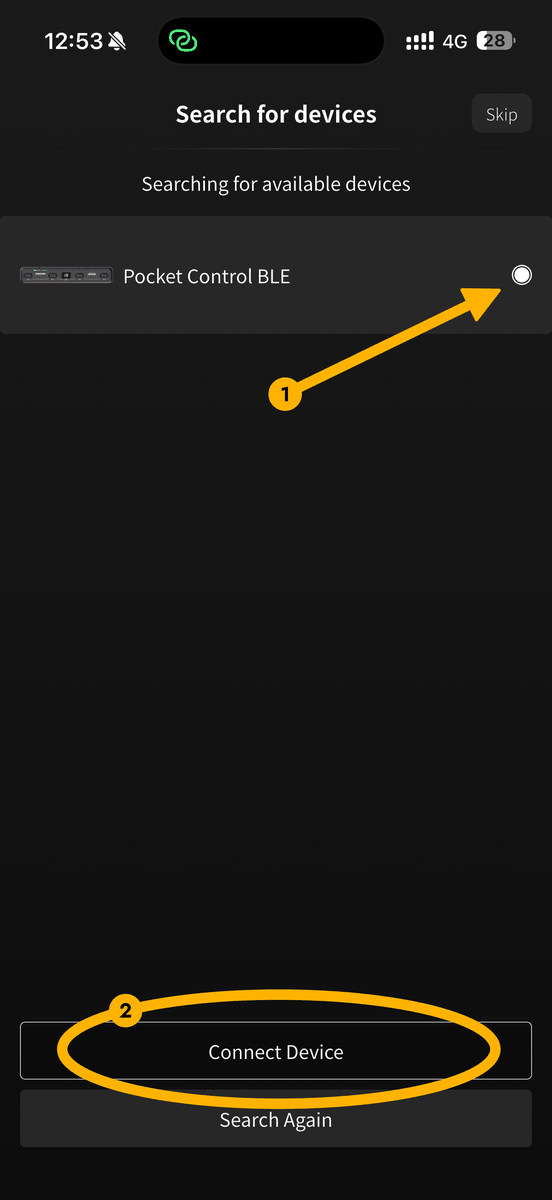
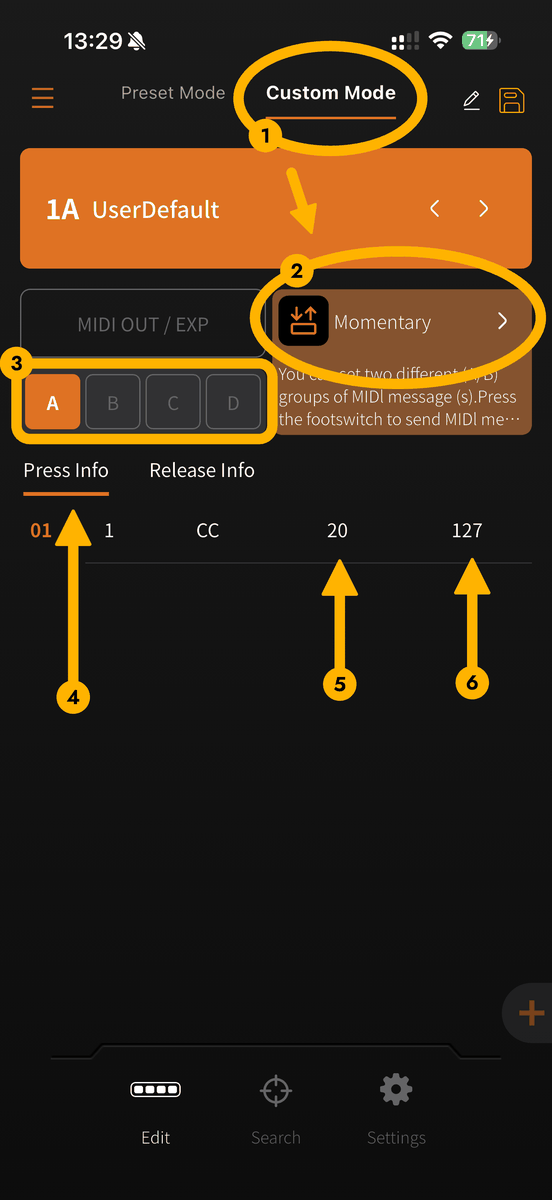
Part 2 - Sonicake Pocket Control Preset
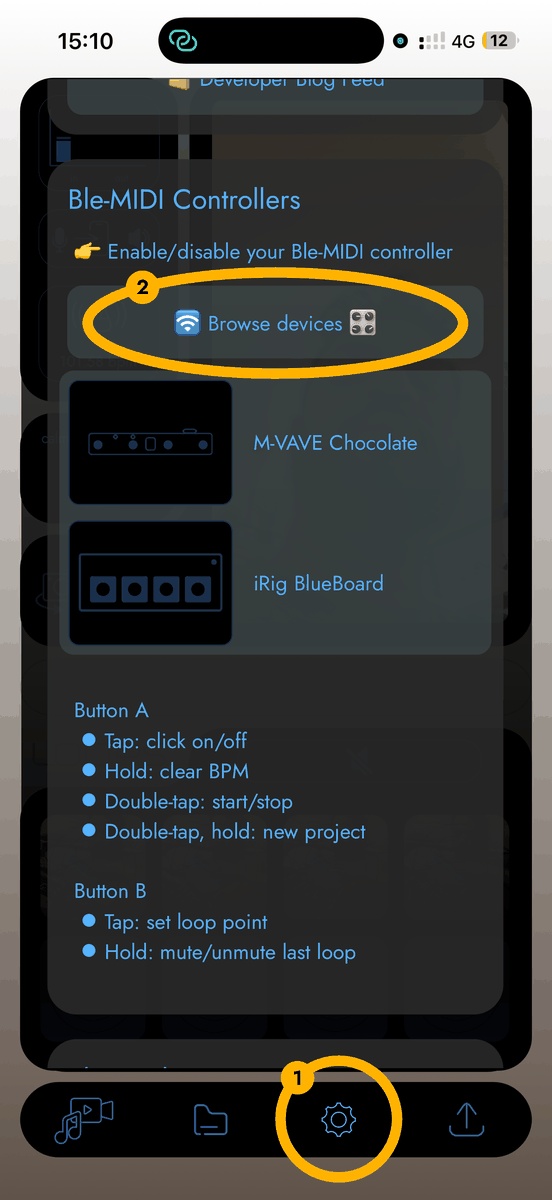
Now the preset is done, let’s go over to Muser Studio’s Settings tab. This is how we Browse for MIDI devices, Connect the Pocket Control BLE device, and enable it. Note that currently we are using the M-VAVE profile. In future this will be more clearly indicated in the interface!
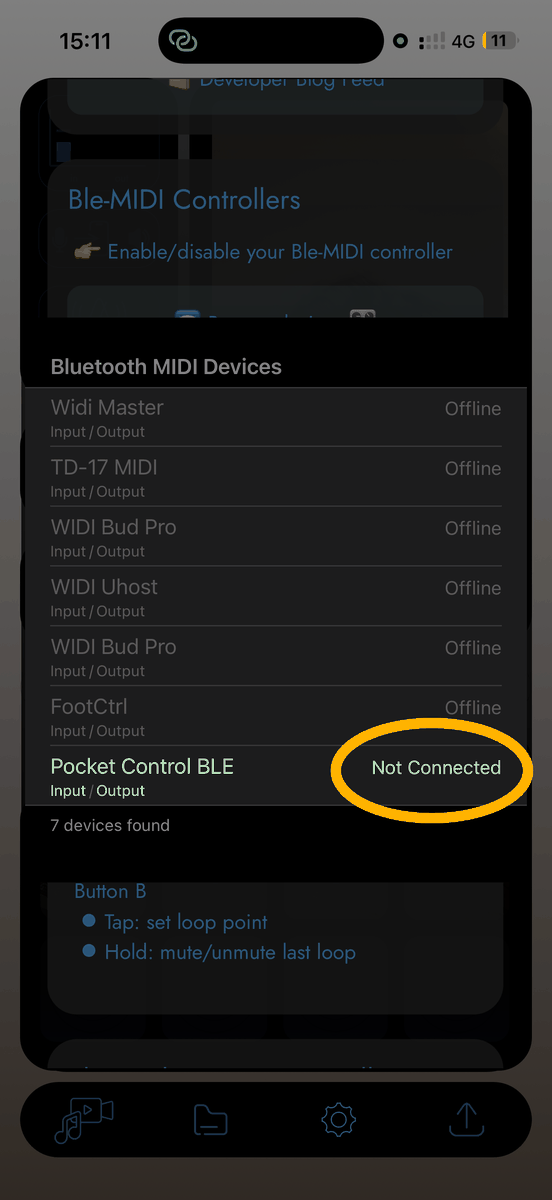
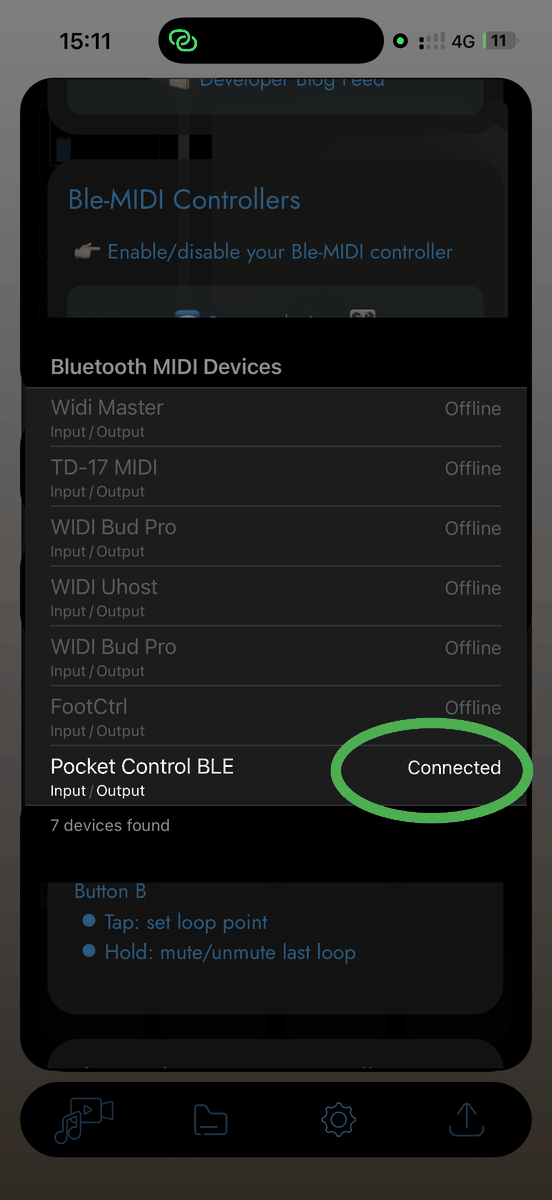
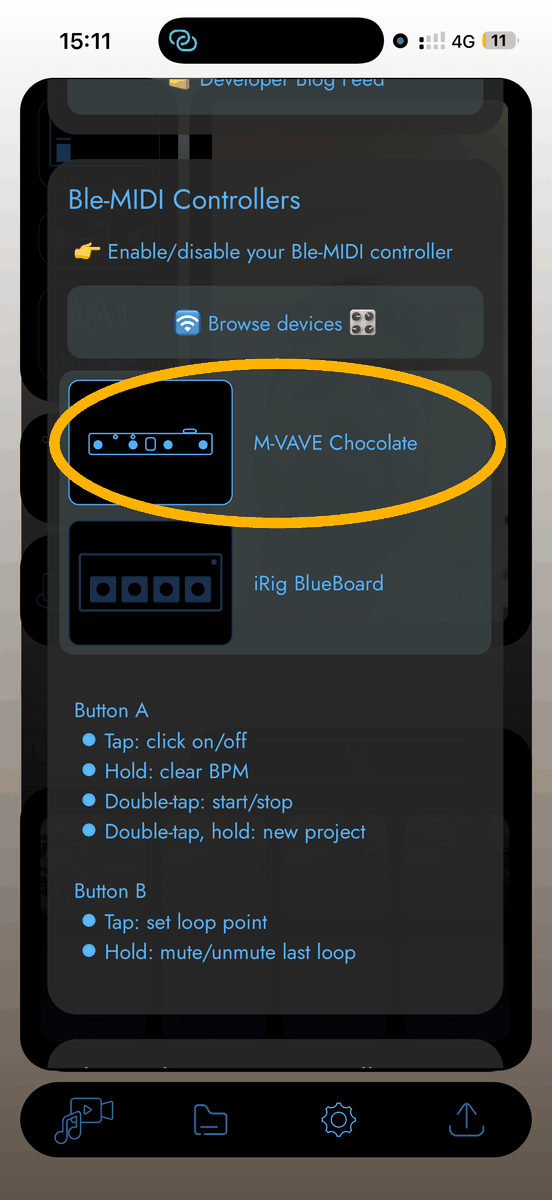
You should be good to go! As always, please reach out if you have any questions or anything in Muser-world isn’t working for you.
👑 Enjoy the silence

v1.0.32 is available now for iOS
Photo credit: Howard Walsh - Bright Sun Setting Over The Calm Ocean Water.
Photo credit: Ivana Cajina - Mountains Surrounded By Body Of Water
No comments yet - be the first!